
An open-source ESP32-C3 desktop companion robot and personal IoT avatar.
[!NOTE] Custom Fork Notice: This repository is a customized and battery-optimized fork maintained by @jagdishtripathy.
Original Upstream Source: SeanChangX/QBIT by Sean Chang. All core firmware architecture, web platform, and 3D enclosure designs are credited to the original author.
Why this fork was created:
- Hardware Protection: Re-mapped GPIO pins (OLED SCL: GPIO 7, SDA: GPIO 6, Touch: GPIO 4, Buzzer: GPIO 5) to move away from ESP32-C3 boot strapping pin GPIO 2, and added safeguards to prevent burnt/damaged ESP32-C3 boards.
- 3.7V LiPo + TP4056 Battery Optimization: Complete wiring and stability guide for powering QBIT inside the 3D-printed enclosure using a 3.7V LiPo battery, TP4056 charging module, and sliding switch without needing bulky boost converters.
- Brownout & Wi-Fi Disconnect Fix: Capped Wi-Fi STA transmission power from 19.5 dBm to
15 dBm, eliminating 500 mA current surges that caused battery voltage sags and continuous brownout reboot loops.- UX Improvements: Extended local IP address display on boot from 3s to 7s, added
"Scan / Tap for text"QR prompt, and fixedplatformio.inito auto-detect Windows COM ports.- Pinned Display (Desk Badge & Kiosk Mode): Lock a chosen
.qgifanimation on continuous loop or display custom scrolling/static text banners (e.g. nameplates, status messages like"DO NOT DISTURB"), with duration timers and one-tap physical dismissal.- Live Music Turntable Visualizer (Mode 1 & Mode 3): Real-time 128×64 OLED spinning vinyl record & tonearm visualizer with marquee Song Title, Artist, progress bar, and animated equalizer bars. Supports zero-click Browser Extension sync (Spotify, YouTube Music, YouTube, SoundCloud), built-in ESP32-C3 NVS Cloud Music Polling (Last.fm & Spotify Web API with zero keys exposed in source code), and MQTT (
qbit/<id>/music).- Dual-Slot Wireless OTA Updates (Firmware + LittleFS Auto-Sync): Dual
app0/app1(1.625 MB each) partition layout enables 100% wireless over-the-air updates without opening the sealed 3D-printed case. Wireless Cloud Auto-OTA automatically flashes bothlittlefs.bin(web dashboard UI & animations) andfirmware.binin a single action with live OLED progress and one-tap cancellation.- Lossless RLE Asset Compression: Custom PackBits RLE compression for embedded boot/idle animations and LittleFS
.qgiffiles, saving >227 KB in binary flash and shrinking animation footprint by up to 75%.




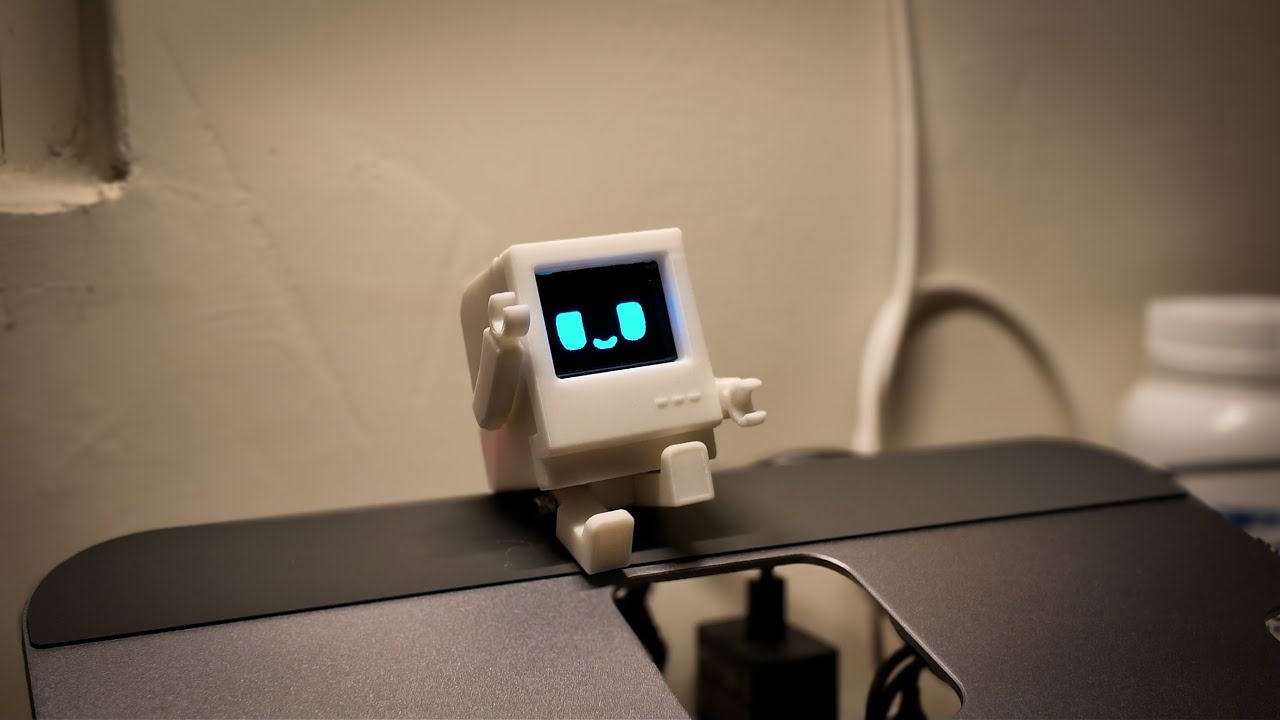
Click the image above to watch the assembly video on YouTube.

Network Real-time device graph |

Poke Send messages to devices |

Flash Browser-based firmware flasher |

Library Community animation repository |
QBIT is a retro robot-style desk companion that works like a personal BB call. Once connected to the QBIT Network, anyone can poke your QBIT and send it messages; you can also connect and interact with other QBITs on the network. When idle, QBIT shows random expressions that change with its mood. You can browse the Library to download community-uploaded custom animations and upload them to your own device. QBIT integrates with Home Assistant via MQTT—Home Assistant can read the poke message and trigger different automations based on the content. Here is a simple example; feel free to share your own setups. XD
Clock Display
- Double-tap the touch sensor to show the current time and date on the OLED screen; tap again to browse notification history
- Supports both 12-hour and 24-hour format — switchable from the on-device settings menu
Animation Playback
- Plays
.qgifanimations in shuffle mode from the device's local storage - Animations change automatically while QBIT is idle
Pinned Display (Desk Badge & Kiosk Mode)
- Lock a specific animation or custom text banner onto the OLED screen, pausing random emotion shuffles
- Animation Pinning: Continuously loops any chosen
.qgiffrom storage (logos, mascots, game sprites) without switching to other emotions - Custom Text Banner: Shows static centered text in a border frame (if <=120 px wide) or smoothly scrolls longer text horizontally (up to 64 characters)
- Configurable Duration: Choose Until Touched (Infinite) or timed durations from 30 minutes to 7 days with live countdown and NVS reboot persistence
- Single-Tap Dismiss: Tap the capacitive touch sensor at any time to instantly unpin and restore normal robot companion emotions
Live Music Turntable Visualizer
- Automatically switches the 128×64 OLED into a spinning vinyl record turntable with tonearm, floating musical notes, scrolling song title & artist, progress bar, and animated spectrum equalizer whenever music plays on your laptop or phone
- Mode 1 (Split Turntable): Left 46×64 px spinning vinyl disc (
r=19) + tonearm; right 82×64 px bold scrolling song title, artist, track progress bar, and 9-band equalizer - Mode 3 (Auto-Flip View): Alternates every 4 seconds between a full-screen vinyl turntable (
r=24) with stereo equalizer bars and a full-screen Now Playing track card - Randomize Mode: Automatically alternates between Mode 1 and Mode 3 every 16 seconds; tap the touch sensor once to manually flip layouts, or double-tap to exit back to robot companion mode
- 3 Sync Methods (Zero API Keys in Source Code):
- QBIT Live Music Sync Browser Extension (Chrome / Edge / Brave): Automatically detects playback from Spotify Web, YouTube Music, YouTube, SoundCloud, Apple Music, JioSaavn, Gaana, and any audible browser tab
- ESP32-C3 Built-in Cloud Polling (Last.fm & Spotify Web API): Credentials are entered in the local
http://qbit.localdashboard and stored strictly in ESP32-C3 NVS flash (Preferences) — works with both phone and PC playback even when the browser is closed - MQTT (
qbit/<id>/music) & Local REST API (/api/music): Push track metadata from Home Assistant, Tasker, or custom scripts
Poke Notifications
- Receive poke messages from other QBIT users on the network
- The sender's name and message appear on-screen with a timestamp
- Poke notifications support various languages: the bitmap is rendered on the web before being sent to the device, so any language can be displayed
- Double-tap to show the clock; tap again to browse notification history
Weather Screen
- Shows current conditions and a short forecast on the OLED, fetched from a public weather API
- Accessible from the top-level menu (long-press, then select WEATHER)
Wireless OTA Updates (Cloud & Local Web)
- On-Device Wireless Cloud OTA: Update directly from the root menu (OTA UPDATE). QBIT securely connects to GitHub Pages via HTTPS, checks
latest.json, compares versions withkQbitVersion, displays current vs remote version, and streams the firmware into the inactive OTA partition with a live progress bar. - One-Tap Download Cancellation: If you decide to cancel an OTA download in progress, simply tap the touch sensor to immediately abort cleanly without bricking the device.
- Local Web Dashboard OTA: Upload pre-compiled
firmware.binorlittlefs.bindirectly from any phone or PC browser viahttp://qbit.localunder the Firmware Update (OTA) card. - Fail-Safe Dual Boot: Uses dual 1.625 MB application slots (
app0andapp1). The active partition is only switched once flash verification succeeds.
UI structure
Long press to open; tap to scroll, long press to enter. Double-tap at top level exits; 10 s idle auto-exits. SETTING changes apply only after [ SAVE ].
ROOT
├── WEATHER        (current conditions and forecast pulled from Open-Meteo)
├── TIMER          (countdown: set H/M/S, start; alarm on expiry, tap dismiss / long-press back)
├── GAME LIBRARY
│   ├── T-Rex Runner   (Chrome dino game)
│   ├── Flappy Bird    (tap-to-fly through pipes)
│   └── Car Avoidance  (lane-dodge driving game)
├── SETTING
│   ├── QBIT Sound   (buzzer on/off)
│   ├── GIF Invert   (invert animation colours)
│   ├── Flip Mode    (display 180°)
│   ├── Clock Format (12h / 24h)
│   └── [ SAVE ]
└── OTA UPDATE     (Wireless Cloud Auto-OTA: checks GitHub releases, live progress bar, tap to cancel)
| Component | Specification | Notes |
|---|---|---|
| MCU | ESP32-C3 Super Mini (e.g. Seeed XIAO ESP32-C3) | Valid GPIOs: 0-10, 20, 21 |
| OLED Display | SSD1306 128x64, I2C, address 0x3C | SH1106-compatible clones also supported |
| Touch Sensor | TTP223 capacitive touch module | Digital output (HIGH when touched) |
| Buzzer | Passive buzzer | Driven via PWM (LEDC) |
Download the STL files for the QBIT enclosure from MakerWorld:
MakerWorld: QBIT - Your IoT Desk Robot (ESP32-C3)
Default pin assignments for the ESP32-C3 Super Mini. All pins can be reassigned through the web dashboard at http://qbit.local and are stored in NVS (persistent across reboots; changes require a reboot to take effect).
| Function | Default GPIO | Direction | Connection |
|---|---|---|---|
| Touch Sensor (TTP223) | GPIO 4 | Input | TTP223 OUT -> GPIO 4 |
| Buzzer (Optional) | GPIO 5 | Output | Driven via 2N2222 transistor or 1kΩ resistor -> GPIO 5 |
| OLED SDA | GPIO 6 | I2C Data | SSD1306 SDA -> GPIO 6 |
| OLED SCL | GPIO 7 | I2C Clock | SSD1306 SCL -> GPIO 7 |
Power connections:
| Component | VCC | GND |
|---|---|---|
| SSD1306 OLED | 3.3V (ESP32 pin) | GND |
| TTP223 Touch Sensor | 3.3V (ESP32 pin) | GND |
Caution
-
Connect Battery / Switch to the
5V(VBUS) pin, NEVER directly to3.3V!- A fully charged 3.7V LiPo battery reaches 4.2V (and 4.2V when plugged into the TP4056 charger).
- The ESP32-C3 absolute maximum voltage limit on the
3.3Vrail is 3.6V. Connecting raw battery power to3.3Vwill instantly fry the ESP32-C3 silicon die! - Connecting through the
5V(VBUS) pin routes power through the board's onboard LDO regulator, safely stepping the 3.7V–4.2V down to a stable 3.3V.
-
Passive Buzzer Protection:
- Standard electromagnetic passive buzzers have an internal coil of only ~16 Ω, drawing >200 mA (ESP32 GPIO limit is 40 mA) and producing inductive flyback voltage spikes of 20V–30V when switched off.
- Safe Solution A (Full volume): Use a 2N2222 NPN transistor (Base to GPIO 5 via a 1kΩ resistor, Emitter to GND, Collector to Buzzer -) with a 1N4007 flyback diode across the buzzer terminals.
- Safe Solution B (Quiet): Solder a 1kΩ resistor in series with the buzzer.
- Safe Solution C (Recommended): Omit the buzzer entirely. QBIT works 100% on the OLED screen with all animations, games, clock, weather, and poke notifications without sound!
[ 3.7V LiPo Battery ]
     │ (+)          │ (-)
     ▼              ▼
   [ B+ ]        [ B- ]   ─── TP4056 Charger
   [OUT+]        [OUT-]
     │              │
     │              └────────────────────────► Common GND (ESP32, OLED, Touch)
     │
[ Slide Switch ]
     │
     └───────────────────────────────────────► ESP32-C3 Super Mini "5V" (VBUS) pin
                                                (Do NOT connect to 3V3!)
The I2C bus runs at 400 kHz. No external pull-up resistors are needed if the OLED module has built-in pull-ups (most breakout boards do).
The easiest way to flash QBIT firmware is through the browser-based flasher. No toolchain installation is required.
- Open the QBIT Firmware Flasher in Chrome or Edge (version 89+).
- Connect your QBIT board via USB.
- Click Connect & Flash and select the serial port.
- The flasher will write the bootloader, partition table, firmware, and filesystem image automatically.
After flashing, if Wi-Fi is not yet configured, QBIT enters Wi-Fi setup mode:
- The OLED shows a QR code (SSID and password) by default. Tap the touch sensor to switch to text: SSID
QBITand password (device MAC last 8 hex digits, e.g.1A2B3C4D). - Connect your phone or computer to the QBIT Wi-Fi access point using the password shown on screen.
- Once connected to the AP, a captive portal opens automatically (or open a browser manually to the setup page). Select your home Wi-Fi and enter its password.
- Credentials are saved to NVS and the device reconnects to your home Wi-Fi; you can then access the dashboard at
http://qbit.local.
If Wi-Fi is lost for about 30 seconds, QBIT automatically opens the AP again so you can reconfigure.
Once connected to Wi-Fi, the QBIT hosts a local web dashboard accessible at http://qbit.local. From here you can upload and manage .qgif animations, adjust settings, and configure MQTT.
 |
 |
 |
 |
| Dashboard Storage, upload, device |
Files Manage .qgif animations |
Web Cam Stream camera to OLED |
Settings MQTT, timezone, GPIO |
From the dashboard you can:
- View the unique device ID and set a custom display name
- Adjust display brightness, buzzer volume, and animation playback speed
- Upload and manage .qgif animation files
- Lock a specific animation or custom text banner via Pinned Display
- Configure a local MQTT broker connection for home automation (see MQTT & Home Assistant)
- Stream your device camera to the OLED in real time via Web Cam (single client at a time; supports multiple dithering modes)
The Pinned Display section in the local dashboard (http://qbit.local) turns QBIT into an interactive desk badge, status monitor, or permanent animation kiosk:
- Open Dashboard: Go to
http://qbit.localin your browser. - Locate Pinned Display Card: Click the card header to expand it if collapsed.
- Select Mode:
- Pinned Animation (.qgif): Select any
.qgiffile stored on flash from the dropdown. It will loop continuously without idle emotion interruptions. - Custom Text Banner: Enter any custom text message (up to 64 characters), such as
"DO NOT DISTURB","IN A MEETING","BUSY CODING", or your name/handle.
- Pinned Animation (.qgif): Select any
- Choose Duration:
- Until Touched (Infinite): Stays on screen indefinitely until manually dismissed or unpinned.
- Timed Presets: 30 Minutes, 1 Hour, 6 Hours, 12 Hours, 1 Day, 3 Days, or 7 Days. The dashboard displays a live countdown of remaining time.
- Click Apply Pin: The display immediately switches to the pinned animation or banner, and the dashboard status badge displays
ACTIVEwith a remaining time counter. - How to Dismiss / Stop:
- On Device: Simply tap the capacitive touch sensor once. QBIT will play a touch chirp (if sound is enabled), instantly exit pinned mode, and resume normal robot emotions.
- From Dashboard: Click the Unpin / Stop button.
The Live Music card in http://qbit.local lets you configure how QBIT detects and displays music playing on your laptop or phone:
- Choose Layout: Select Randomize (Mode 1 & Mode 3), Mode 1: Split Turntable, or Mode 3: Auto-Flip View.
- Choose Auto Sync Source:
- Browser Extension / MQTT: Install the QBIT Live Music Sync Chrome/Edge extension to automatically sync any music playing in your browser (Spotify Web, YouTube Music, YouTube, SoundCloud, etc.) with zero clicks.
- Last.fm Cloud (Phone & PC — Works with Free Spotify): Enter your Last.fm Username and API Key and click Save Sync Config. Credentials are saved strictly inside your ESP32-C3's NVS flash (never exposed in code or returned over HTTP). QBIT polls Last.fm every 6 seconds and animates songs played on your phone or PC.
- Spotify Web API (Cloud — Requires Spotify Premium): Enter your Spotify Client ID, Client Secret, and Refresh Token to poll
/v1/me/player/currently-playingdirectly from the ESP32-C3.
Since QBIT is sealed inside a 3D-printed enclosure with only the TP4056 charging port exposed, all firmware and filesystem (littlefs.bin) updates can be performed completely wirelessly via two methods:
- Trigger Update: Click WIRELESS UPDATE on the
http://qbit.localdashboard, or long-press the touch sensor on QBIT and selectOTA UPDATE. - Version Check: QBIT connects to Wi-Fi and queries the GitHub release server (
latest.json):- If already on the latest version, it displays
"Up to date! (vX.Y.Z)"and exits safely. - If a newer version is available, it begins the update automatically.
- If already on the latest version, it displays
- Automatic LittleFS + Firmware Flash: QBIT first downloads and flashes
littlefs.bin(U_SPIFFS— updating the web dashboard UI and built-in animations), followed immediately byfirmware.bin(U_FLASH) with a live OLED progress bar ("Updating FS XX%"->"Downloading XX%"). - Cancel Anytime: Tap the touch sensor at any time during download to cancel safely.
- Automatic Reboot: Upon successful download and verification, QBIT switches the active boot slot and reboots into the new firmware.
- Connect to the same Wi-Fi network as your QBIT.
- Navigate to
http://qbit.local(or your device's IP address) in your web browser. - Scroll to the OTA Update (.bin) section.
- Choose your
.binfile (firmware.binor filesystemlittlefs.bin— QBIT automatically detects filesystem images by filename orlittlefsmagic header). - Click Flash .bin Wirelessly. A live upload bar will show progress, and QBIT will reboot automatically upon completion.
The QBIT web platform can be self-hosted and provides a central interface for monitoring and interacting with all your online QBIT devices.
If you use the official firmware, your device will automatically connect to the official server: https://qbit.labxcloud.com
If you prefer, you can deploy your own web platform and backend on your own server, and configure the firmware to connect to your custom domain.
The Network page shows all currently connected QBIT devices as an interactive graph powered by vis-js/vis-network. Each node displays the device name. Devices that have been online longer are drawn closer to the central hub. The current number of online devices is displayed at the bottom.
Clicking a device node opens a poke dialog where logged-in users can:
- Poke -- send a text message (up to 25 characters) to the device. Both the sender name and message text are rendered as 1-bit bitmaps on the web to support multi-language display (including CJK and emoji) on the monochrome OLED. If the text exceeds the screen width, it scrolls horizontally.
- Claim -- bind a device to your account (see Device Claiming). Claimed devices show the owner's name and avatar on the graph node.
- Unclaim -- remove your ownership of a claimed device.
The Flash page embeds the browser-based firmware flasher, allowing users to flash their QBIT directly from the web platform without visiting a separate site.
The Library page is a community-driven repository of .qgif animation files.
QBIT uses a custom binary animation format (.qgif) optimized for the 128x64 monochrome OLED. The format stores 1-bit monochrome frames with per-frame delay values.
Binary layout
| Offset | Type | Description |
|---|---|---|
| 0 | uint8 | Frame count |
| 1-2 | uint16 LE | Width (pixels) |
| 3-4 | uint16 LE | Height (pixels) |
| 5+ | uint16 LE[] | Per-frame delay (ms), one per frame |
| ... | uint8[] | Frame data: 1024 bytes per frame (128x64 / 8), row-major |
Use the included conversion tool to create .qgif files from standard GIF animations:
pip install Pillow
python tools/gif2qbit.py input.gif
python tools/gif2qbit.py input.gif --threshold 100 --invert --scale stretch
python tools/gif2qbit.py *.gif
Options:
| Flag | Description |
|---|---|
-o / --output |
Output file path |
--threshold |
Binarization threshold (0-255, default 128) |
--invert |
Invert black/white |
--scale |
Scaling mode: fit (default), stretch, fit_width, fit_height |
Use the included reverse-conversion tool to convert .qgif files back to standard GIF animations:
pip install Pillow
python tools/qgif2gif.py input.qgif
python tools/qgif2gif.py input.qgif --invert --scale 4
python tools/qgif2gif.py *.qgif
python tools/qgif2gif.py /path/to/qgifs/
Options:
| Flag | Description |
|---|---|
-o / --output |
Output file path (single-file mode only) |
--invert |
Invert colours (swap black and white) |
--scale |
Scale factor for output (default: 1, e.g. 4 for 512×256) |
To embed a .qgif animation into firmware as a PROGMEM constant (e.g. for idle or boot animations):
python tools/qgif2header.py firmware/include/sys_idle.qgifThis generates a C header file with the animation data as an AnimatedGIF struct, ready for #include in firmware source.
QBIT supports local MQTT integration with automatic Home Assistant discovery. Configure the MQTT broker connection from the device dashboard at http://qbit.local.
Once connected, the device publishes HA discovery payloads that automatically create the following entities in Home Assistant:
| Entity | Type | Description |
|---|---|---|
| Status | Binary Sensor | Online/offline connectivity status |
| IP | Sensor | Device local IP address |
| Poke | Button | Send a poke message to the device |
| Last Poke | Sensor | Last received poke (sender, message, time as attributes) |
| Mute | Switch | Toggle buzzer mute (ON = muted) |
| Touch | Sensor | Touch gesture: single_tap, double_tap, long_press |
| Next Animation | Button | Switch to the next .qgif animation |
MQTT topics (default prefix qbit)
| Topic | Dir | Description |
|---|---|---|
qbit/<id>/status |
Pub | online / offline (retained, with LWT) |
qbit/<id>/info |
Pub | Device info JSON (id, name, ip) |
qbit/<id>/command |
Sub | Commands. JSON: {"command":"poke","sender":"...","text":"..."} |
qbit/<id>/poke |
Pub | Poke event JSON (sender, text, time) |
qbit/<id>/mute/state |
Pub | Mute state ON / OFF (retained) |
qbit/<id>/mute/set |
Sub | Set mute: ON or OFF |
qbit/<id>/touch |
Pub | Touch event JSON (type: gesture type) |
qbit/<id>/animation/state |
Pub | Currently playing animation filename (retained) |
qbit/<id>/animation/next |
Sub | Trigger switch to next animation (no payload) |
qbit/<id>/music |
Sub | Live music turntable JSON: {"playing":true,"title":"...","artist":"...","progress":42,"duration":210,"style":0} |
Logged-in users can claim a QBIT device to bind it to their account. Claimed devices display the owner's name and avatar on the Network graph.
Claiming flow:
- Click a device on the Network page and select "Claim this device".
- Enter the full 12-character device ID (printed on the device dashboard).
- The web sends a claim request to the device via WebSocket.
- The QBIT OLED displays the requester's name and prompts for a long-press confirmation.
- Long-press the touch button on the device to confirm, or wait 30 seconds to reject.
- On confirmation, the claim is stored on the server and the device shows the owner's avatar on the graph.
Unclaiming:
Click a claimed device on the Network page and select "Unclaim this device". Only the owner can unclaim.
- A Linux server (VPS) with Docker and Docker Compose installed
- A domain name with DNS managed by Cloudflare (or any reverse proxy that provides TLS)
- A Google Cloud project with OAuth 2.0 credentials
Architecture
Internet
  |
  +-- Cloudflare Tunnel / Reverse Proxy (TLS termination)
        |
        +-- frontend (Nginx, port 80)
        |     |-- Serves React SPA
        |     |-- Proxies /api/, /auth/, /socket.io/, /device to backend
        |
        +-- backend (Node.js, port 3001 + 3002)
              |-- REST API (devices, poke, library, claims)
              |-- Google OAuth (Passport.js)
              |-- Socket.io (real-time frontend updates)
              |-- WebSocket /device (ESP32 device connections)
              |-- Admin UI on port 3002 (sessions, users, devices, bans)
              |-- SQLite DB + files in /data (volume)
Only the frontend container exposes port 80 (mapped to host 3000) to the internet. The backend listens on 3001 (API) and 3002 (admin); restrict port 3002 to internal/VPN. Backend storage: SQLite database qbit.db, library files under /data/files/, and optional /data/secrets.json for auto-generated session and health secrets.
Copy the example and fill in your values:
cd web
cp .env.example .env| Variable | Description |
|---|---|
GOOGLE_CLIENT_ID |
OAuth 2.0 client ID from Google Cloud Console |
GOOGLE_CLIENT_SECRET |
OAuth 2.0 client secret |
GOOGLE_CALLBACK_URL |
OAuth callback URL, e.g. https://yourdomain.com/auth/google/callback |
COOKIE_DOMAIN |
Parent domain for cookies, e.g. .yourdomain.com |
FRONTEND_URL |
Full frontend URL for CORS, e.g. https://yourdomain.com |
DEVICE_API_KEY |
Shared secret with ESP32 firmware. Must match WS_API_KEY in firmware. |
MAX_DEVICE_CONNECTIONS |
Max device WebSocket connections (default: 100) |
MAX_DEVICE_CONNECTIONS_PER_IP |
Max device WebSocket connections from a single IP (default: 10) |
ADMIN_USERNAME |
Admin UI login (1–64 chars). Empty = no admin login. |
ADMIN_PASSWORD |
Admin UI password (8–128 chars). |
Optional (auto-generated and stored in /data/secrets.json if not set): SESSION_SECRET, ADMIN_SESSION_SECRET, HEALTH_SECRET.
Generate secure random values (e.g. for DEVICE_API_KEY):
openssl rand -hex 32Passwords with special characters: Use the .env file and wrap values in double quotes. Escape \ and " inside (e.g. ADMIN_PASSWORD="my\"pass").
For CI builds, set the QBIT_WS_API_KEY repository secret to the same value as DEVICE_API_KEY; it is injected into the firmware at build time.
cd web
docker compose -f docker-compose.dev.yml up --build| Endpoint | URL |
|---|---|
| Frontend | http://localhost:3000 |
| Backend API | http://localhost:3001 |
| Health | http://localhost:3001/health |
For Google OAuth locally, add http://localhost:3000/auth/google/callback to Authorized Redirect URIs in Google Cloud Console.
cd web
docker compose up --build -d
This starts the frontend (exposed on port 3000) and backend (internal only) containers. Point your reverse proxy or Cloudflare Tunnel to the frontend service on port 3000. The frontend Nginx configuration handles proxying all API, auth, WebSocket, and Socket.io traffic to the backend internally. Only port 3000 is intended for external access; the backend is not exposed to the internet.
Verify the deployment:
docker compose ps             # both containers should be running
docker compose logs backend # should show "QBIT backend listening on port 3001"All persistent data is in the qbit-data volume (path /data inside the backend container): SQLite database qbit.db (sessions, users, claims, bans, library metadata), uploaded library files in files/, and secrets.json for auto-generated secrets.
The backend logs to stdout (pino, JSON in production). View with docker compose logs -f backend. No log files are written.
GET /health returns server status (uptime, devices, claims, online users, library count). Use ?format=json for JSON. From the server: docker exec qbit-frontend curl -s http://backend:3001/health.
Two workflows are included:
Build and Release (build-and-release.yml) -- triggered on version tags (v*):
- Compiles firmware with PlatformIO
- Builds the LittleFS filesystem image from
firmware/data/ - Injects
WS_HOSTandWS_API_KEYfrom repository secrets (QBIT_WS_HOST,QBIT_WS_API_KEY) - Creates a GitHub Release with
firmware.bin,littlefs.bin,bootloader.bin, andpartitions.bin
Deploy Flasher (deploy-gh-pages.yml) -- triggered after a successful build or on push to main:
- Downloads the latest release artifacts from this repository (
jagdishtripathy/QBIT) - Generates
manifest.jsonandlatest.jsonfor esp-web-tools with partition offsets matchingfirmware/partitions.csv - Deploys the flasher tool to GitHub Pages (
https://jagdishtripathy.github.io/QBIT/)
How to Publish Your Own Firmware Update:
- Commit and push your changes to
main. - Create and push a semantic version tag (e.g.
v1.1.0):git tag v1.1.0 git push origin v1.1.0
- GitHub Actions will automatically compile
firmware.binandlittlefs.bin, create a GitHub Release withlatest.json, and publish the web flasher tohttps://jagdishtripathy.github.io/QBIT/. - Online QBIT devices running an older version tag will detect the new version from
https://jagdishtripathy.github.io/QBIT/latest.jsonand display[ Update available ]on the OLED and dashboard.
To set up CI/CD, add these repository secrets in GitHub (Settings > Secrets and variables > Actions > Repository secrets):
| Secret | Value |
|---|---|
QBIT_WS_HOST |
Your backend domain (e.g. qbit.labxcloud.com) |
QBIT_WS_API_KEY |
Same value as DEVICE_API_KEY in your .env |
Requirements: PlatformIO CLI (or PlatformIO extension in VSCode / Antigravity).
cd firmware
pio run --target upload         # compile and flash firmware
pio run --target uploadfs       # CRITICAL: upload LittleFS filesystem (dashboard UI & animations)
pio device monitor              # open serial monitor (115200 baud)
Important
Do not skip pio run --target uploadfs!
The local web dashboard (index.html, script.js, style.css) lives on the flash filesystem partition. If you only run upload, the web server will start but return 404 File not found.
Tip
Windows Users:
firmware/platformio.iniis configured to automatically detect your COM port (e.g.,COM4).- If
piois not recognized in PowerShell, add PlatformIO's Python scripts directory:$env:Path += ";$env:APPDATA\Python\Python312\Scripts"
The firmware connects to the backend WebSocket server using the WS_HOST, WS_PORT, and WS_API_KEY build flags. Override them in firmware/platformio.ini under build_flags (commented examples are included). The fallback defaults localhost:3001 with an empty API key are defined in firmware/src/network_task.cpp. For production builds via GitHub Actions, these values are injected from repository secrets at compile time.
Custom partition table (firmware/partitions.csv)
| Tool | Description |
|---|---|
tools/gif2qbit.py |
Convert standard GIF animations to the .qgif format |
tools/qgif2gif.py |
Convert .qgif files back to standard GIF animations |
tools/qgif2header.py |
Convert .qgif files to C header files for PROGMEM embedding |
tools/png2xbm.py |
Convert small PNG icons (≤16×16) to u8g2 XBM-style C arrays |
tools/simulate-devices.py |
Simulate multiple QBIT devices connecting to the backend for testing |
tools/qbit-ctl |
TUI for inspecting and managing the backend SQLite database and /data files |
tools/flasher/ |
Browser-based firmware flasher (deployed to GitHub Pages) |

This project is licensed under the Creative Commons Attribution-NonCommercial-ShareAlike 4.0 International (CC BY-NC-SA 4.0).
Commercial use of this project or any derivative works is not permitted without explicit permission from the author. For commercial licensing, contact: scx@gapp.nthu.edu.tw